Campaigns in Oration
Campaigns in Oration AI enable you to reach your customers with AI-powered calls at scale. Set up automated outbound campaigns to engage customers, conduct surveys, deliver important messages, or follow up on services. With intelligent scheduling, SQL-based targeting, and comprehensive attempt management, campaigns help you connect with the right customers at the right time. Step by step, learn how to create and configure your first campaign. Select Campaigns from the side navigation and click New Campaign button on the right top corner.Using Customer Uploaded Data in Campaigns
To enhance your campaign targeting, you can upload customer data in CSV format. This allows you to leverage existing customer information for more effective outreach. Here’s how to do it:-
Prepare Your CSV File: Create a CSV file with the necessary fields that match your SQL query requirements. Below is a sample snippet of the CSV format you should use:
File Structure
- identifier: Unique identifier for each customer.
- customerType: Type of customer (e.g., ‘welcome-campaign’).
- lastPurchaseDate: The date of the customer’s last interaction or purchase. This is customized variable aka Dynamic Variable used for personalized message for each customer.
- Upload the CSV File: Navigate to the Customers section in the platform and upload your prepared CSV file. Ensure that the data is correctly formatted and all required fields are included.
- Create your campaign: Once the customer data is uploaded, you are all set to create your campaign.
Create New Campaign
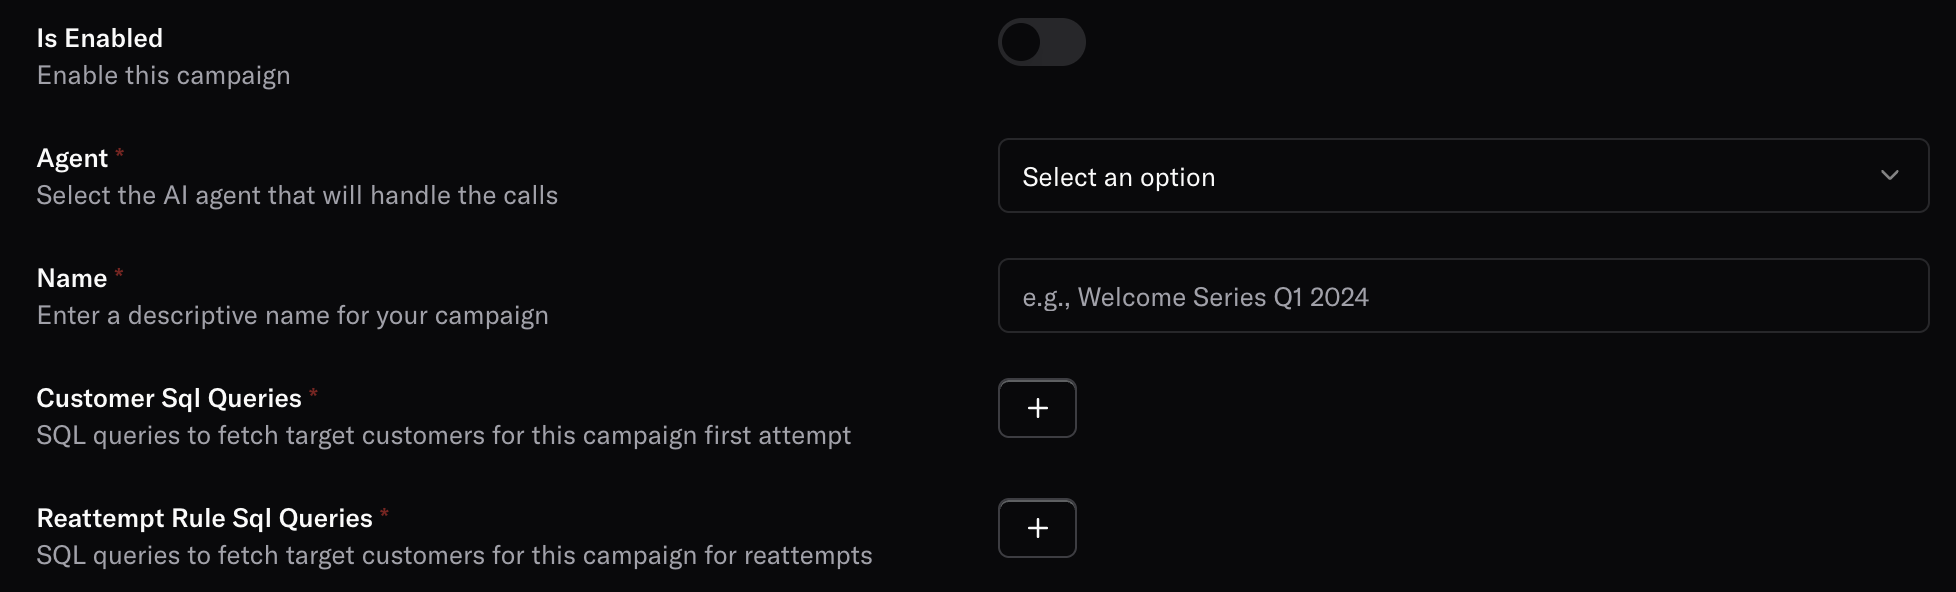
Campaign Status
Is Enabled: Toggle to activate or deactivate your campaign. When enabled, the campaign will run according to its schedule and settings.Agent Selection
Agent: Select the AI agent that will handle the calls for this campaign. Choose from your existing agents that are configured with appropriate prompts and behaviors for your campaign goals.Campaign Identity
Name: Enter a descriptive name for your campaign (e.g., “Welcome Series Q1 2024”). This helps you identify and manage multiple campaigns.Customer Targeting
SQL queries to fetch target customers for this campaign first attempt: Write SQL queries to identify which customers should receive calls in the initial attempt. This allows precise targeting based on customer data, demographics, purchase history, or any other criteria in your database. For example:What does this query do?
This query looks into the customers list and picks out the IDs of only those customers who match certain conditions.Step‑by‑step explanation:
-
Filter by customer type
Every customer has some extra information stored in a metadata field. One of these details iscustomerType. In this query, we are looking only for customers wherecustomerType = 'campaign'. You can change ‘campaign’ to any other value depending on the type of customers you want to filter — for example, ‘lead’, ‘prospect’, or ‘subscriber’. -
Filter by workspace
Each customer belongs to a specific workspace. The query usesWORKSPACE_IDto fetch customers for only that specific workspace. This is managed internally by the Oration team, so you usually don’t need to change it. -
Filter by date range
It only picks customers whoseupdated_atdate is after the campaign run start date (CAMPAIGN_RUN_START_DATE) and before one day after that date. In simple terms, it’s finding customers who were updated within 24 hours from the start of the campaign.
In short:
“Give me the IDs of all customers from this workspace, whose type is ‘campaign’, and who were updated within one day after the campaign started.”Reattempt Rule Sql Queries
SQL queries to fetch target customers for this campaign for reattempts: Define separate SQL queries for customers who should receive follow-up attempts. This enables different targeting logic for reattempts, such as excluding customers who have already responded or focusing on high-priority segments.What does this query do?
This query finds the IDs of customers who:- Belong to a specific campaign and workspace
- Were updated within one day of the campaign starting
- Had a telephony call conversation during that campaign but no actual user messages recorded in the transcript.
Step‑by‑step explanation
-
Identify customers from telephony conversations without user messages
First, the query looks at the conversations table and picks out conversations that:- Are of type telephony (phone calls)
- Are part of a specific campaign run (CAMPAIGN_RUN_ID)
- Belong to a specific workspace (WORKSPACE_ID)
- Have a linked customer (customer_id is not empty)
- Either have no conversation transcript (t.messages IS NULL) or the transcript text does not contain the term userMessage (meaning the agent spoke, but the system did not detect anything from the customer).
-
Match those customers in the customers list
The query then joins this list with the customers table to get details for those customers. -
Apply customer filters
The results are further filtered to include only customers who:- Have customerType in their metadata set to ‘welcome-campaign’. This is just a tag to identify the campaign type — the name can be different depending on the campaign.
- Belong to the same workspace indicated by WORKSPACE_ID
- Were updated after the campaign started (CAMPAIGN_RUN_START_DATE) and before one day later.
In short:
“Give me the IDs of all customers from this workspace, tagged for the ‘campaign’, updated within 24 hours of the campaign start, who had a telephony conversation during this campaign but no actual voice/message recorded from the customer.”Call Attempt
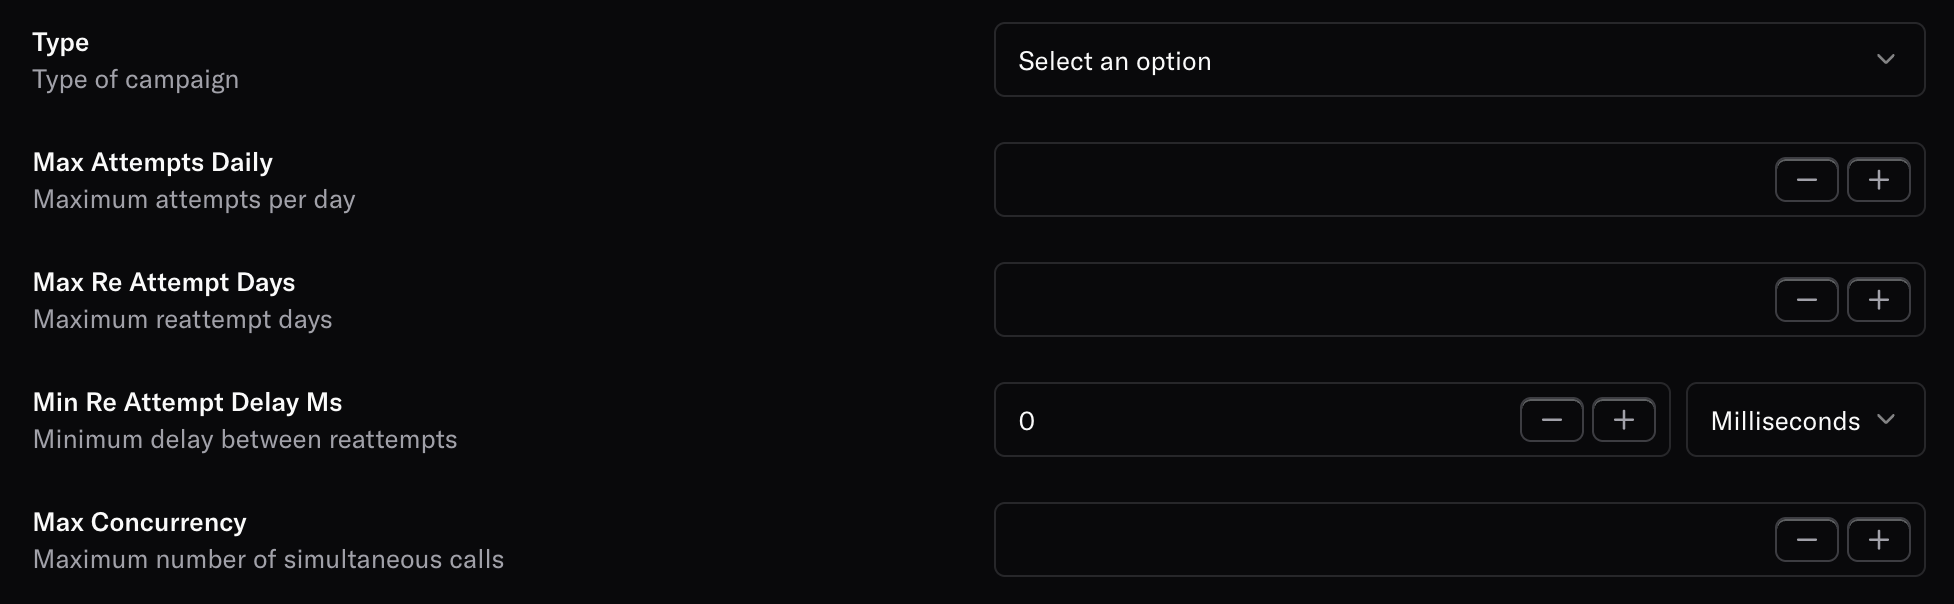
Campaign Type
Type of campaign: Select the campaign type from available options. Choose “single” for one-time campaigns or “recurring” for campaigns that run on a regular schedule based on your campaign strategy.Attempt Management
- Max Attempts Daily: Set the maximum number of call attempts per customer per day. This prevents overwhelming customers while ensuring adequate outreach.
- Max Re Attempt Days: Define the maximum number of days over which reattempts should be made. This controls the campaign duration and prevents indefinite calling.
- Min Re Attempt Delay: Set the minimum delay between reattempts to the same customer. This ensures appropriate spacing between calls.
Concurrency Control
Max Concurrency: Specify the maximum number of simultaneous calls your campaign can make. This helps manage system resources and calling capacity.Concurrency and Scheduling
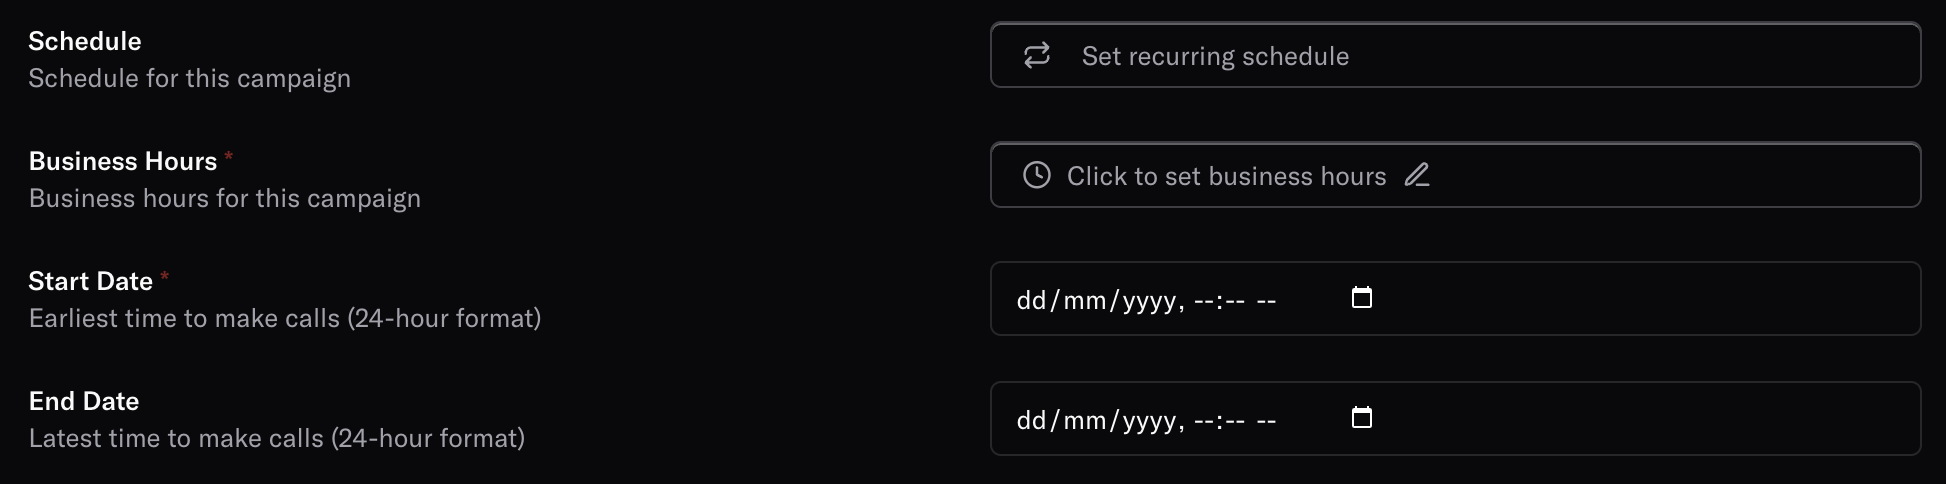
Scheduling
Schedule: Configure when your campaign should run. Set up recurring schedules or specific time windows for optimal customer engagement.Business Hours
Business Hours: Define the hours during which calls can be made. Click “Click to set business hours” to configure appropriate calling windows that respect customer preferences and regulations.Campaign Timeline
- Start Date: Set the earliest time to make calls using 24-hour format (dd/mm/yyyy, —:— —). This defines when your campaign becomes active.
- End Date: Set the latest time to make calls using 24-hour format (dd/mm/yyyy, —:— —). This automatically stops the campaign after the specified date.
Best Practices
SQL Query Tips
- Use precise targeting criteria to reach the most relevant customers
- Test your SQL queries with small datasets before launching full campaigns
- Consider customer preferences and opt-out status in your queries
- Use different logic for first attempts vs. reattempts
Scheduling Recommendations
- Set business hours that align with your customers’ time zones
- Avoid calling during holidays or inappropriate hours
- Use reasonable attempt delays to prevent customer annoyance
- Monitor campaign performance and adjust timing as needed
Campaign Management
- Start with small test campaigns before scaling up
- Monitor max concurrency to ensure system performance
- Set appropriate end dates to prevent campaigns from running indefinitely
- Regularly review and update your targeting criteria
Need more help? Reach out to our team at developers@oration.ai