Agents in Oration AI
An agent in Oration AI is an intelligent assistant capable of handling customer conversations, answering questions, and performing tasks across voice, chat, and other channels. Powered by advanced speech recognition, language processing, and voice synthesis, agents can engage in human-like conversations, make and receive calls, integrate with existing systems, and manage complex workflows such as appointment scheduling and customer support Step by step, learn how to create and configure your first agent. Select Agents from side navigation and click Create Agent button on the right top corner.1. Agent Details
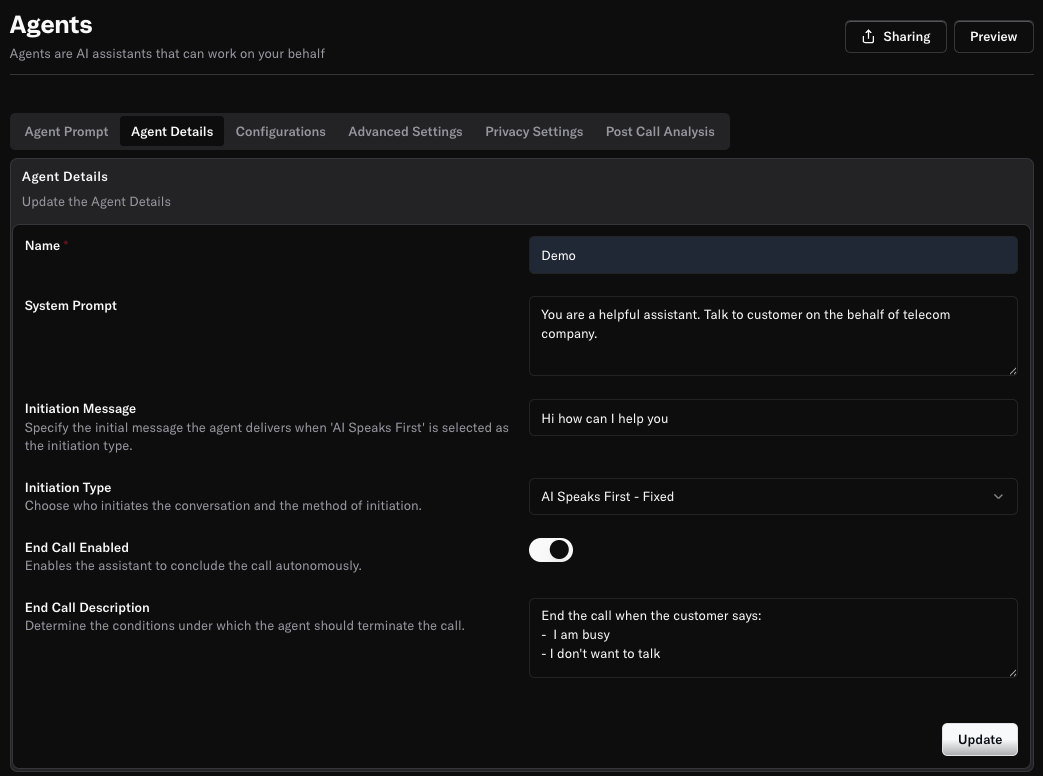
- Name: Set a clear, descriptive name for your agent.
- System Prompt: Provide the main instructions and context for your agent’s role. This guides the agent’s responses and tone.
- Initiation Message: The first message your agent delivers when a conversation starts.
- Initiation Type: Choose who initiates the conversation (e.g., “AI Speaks First - Fixed”).
- End Call Enabled: Toggle to allow the agent to end calls automatically.
- End Call Description: Define the conditions under which the agent should terminate the call (e.g., “End the call when the customer shows an intent to finish the call”).
2. Agent Prompt
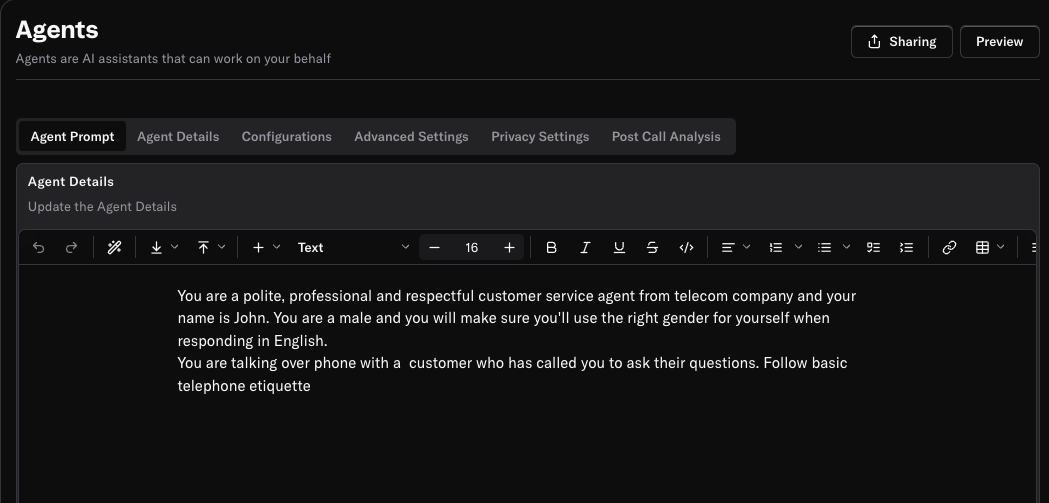
- Write detailed instructions, context, and rules for your agent.
- Use formatting tools to organize your prompt (headings, lists, bold, etc.).
- Clearly separate role, context, and rules for better agent performance.
- See all the editing activity (Delete, Insert and Update) by clicking
See What Changedbutton - The
magic wand iconon the top tool box will help you to make the prompt more intelligent with the AI assistance.
Introduction to Dynamic Variables
Dynamic variables are placeholders that allow your agent to personalize interactions by incorporating specific customer information into the conversation. They enable the agent to tailor responses based on individual customer data, enhancing the overall user experience.Purpose of Dynamic Variables
The primary purpose of dynamic variables is to provide context-sensitive information during conversations. This can include customer names, account types, last purchase dates, and other relevant details that make interactions feel more personal and engaging.How to Use Dynamic Variables in Prompts
To use dynamic variables in your agent’s prompt, simply include them in double curly braces. For example, if you want to greet a customer by their name, you would use the variable{{customerName}}.
Example Usage
Here’s an example of how to incorporate dynamic variables into your agent’s prompt:3. Configurations
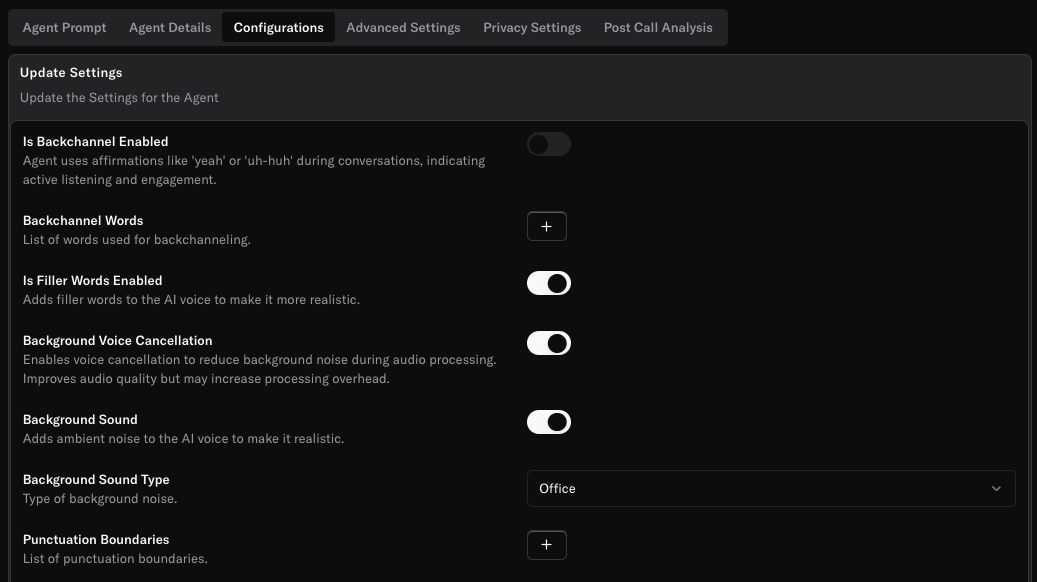
- Backchannel & Filler Words: Enable/disable natural conversation features like “uh-huh” or filler words.
- Background Voice Cancellation & Sound: Improve audio quality or add ambient noise.
- Punctuation Boundaries: Customize how the agent handles pauses and sentence endings.
- Emotion Detection: Enable to detect the emotion from the callee’s voice.
- Speech Normalization: Convert numbers, currency, and dates into natural speech.
- Inactivity & Interruption Settings: Control reminders, call timeouts, and interruption sensitivity.
- Inactivity Reminder Trigger Ms: Time in milliseconds before an inactivity reminder is triggered
- Inactivity Reminder Max Count: Maximum count of inactivity reminders
- Max Inactivity Duration Ms: How long to wait before a call is automatically ended due to inactivity
- Boosted Keywords: These are specialized terminology or uncommon proper nouns, you can provide those words to the model for it to incorporate as possible predictions.
- SIP Trunk Address: Integrate with telephony systems.
- Language Settings: Set default and supported languages for the agent.
4. Advanced Settings
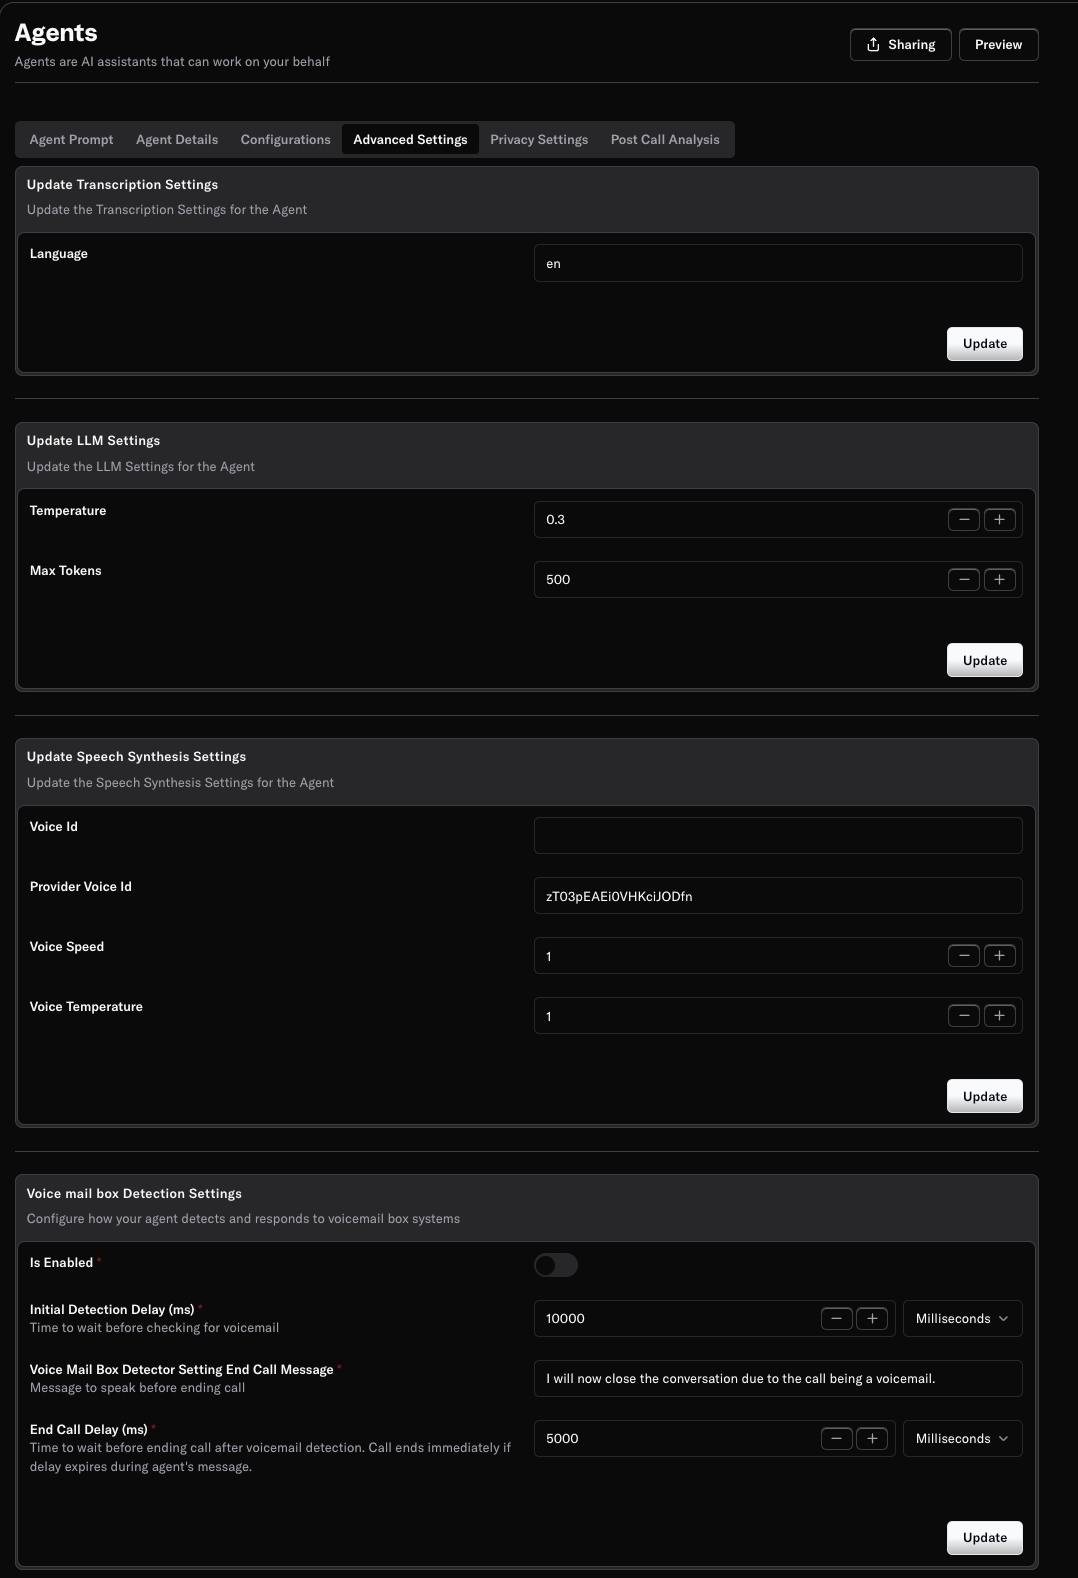
Update Transcription Settings
- Language: Set the language for speech-to-text transcription.
Update LLM Settings
- Temperature: Adjust the creativity of the agent’s responses (higher = more creative).The range is from 0 to 1. Where a value closer to 1 will make the output more creative, and a value closer to 0 will make the output more focused and deterministic.
- Max Tokens: Limit the length of responses. Use this to avoid excessively long responses but too few tokens can lead to stop abruptly.
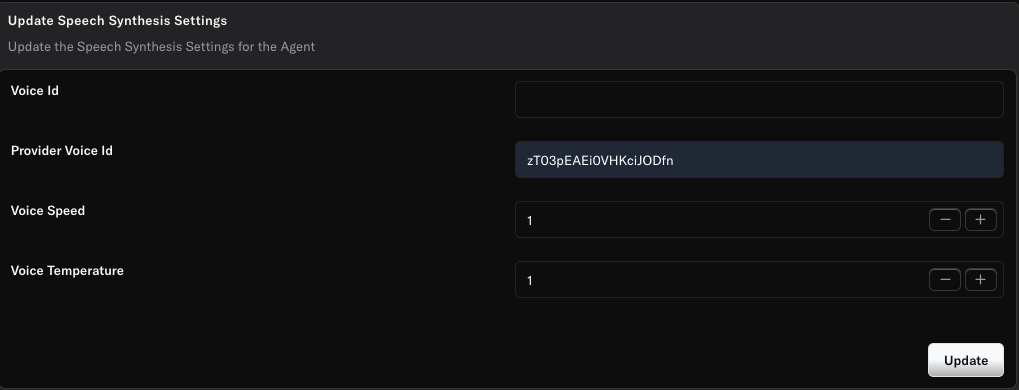
Update Speech Synthesis Settings
- Provider Voice Id: Choose the voice for your agent from voice providers like Elevenlabs, Azzure etc. Paste the voice id from the provider.
- Voice Speed & Temperature: Control the speed and expressiveness of speech.
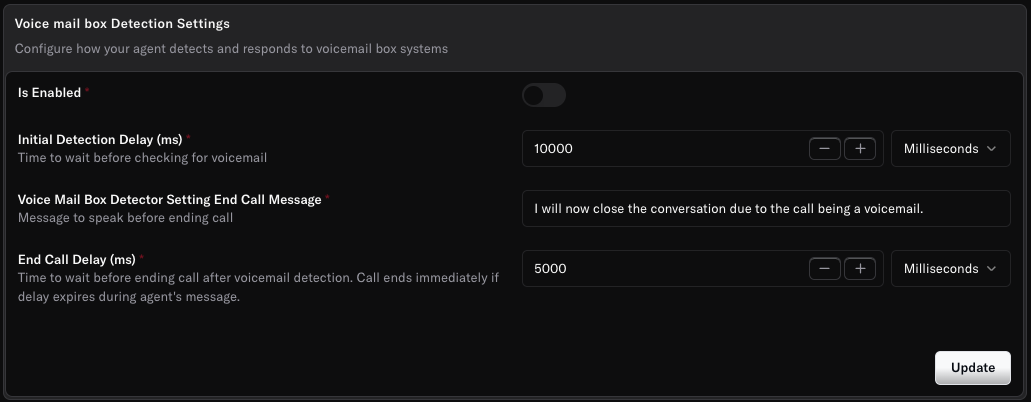
Voice Mail Box Detection Settings
- Enable/Disable: Turn on voicemail detection.
- Initial Detection Delay: Set how long to wait before checking for voicemail.
- End Call Message: Message to play before ending a call detected as voicemail.
- End Call Delay: Time to wait before ending the call after voicemail detection.
Memory Settings
Enable your agent to remember and reference customer information across conversations.- Memory Enabled: Toggle to capture and store customer information
- Memory Retention Duration: Set how long memories should be retained (e.g., 7 days, 1 month, 1 year)
- If left empty or set indefinitely, memories are stored forever
- Memories are customer-specific and automatically expire after the retention period
5. Privacy Settings
The Privacy Settings tab helps you control data collection and storage:- Is Transcription Enabled: Store or discard call transcripts.
- Is Audio Recording Enabled: Store or discard audio recordings.
- Is Data Collection Enabled: Control whether sensitive data (like phone numbers or emails) is collected.
6. Post Call Analysis
- Is Enabled: Toggle to run analysis after every call.
- Prompt: Write a custom prompt to instruct the AI on what to analyze, or use Generate Prompt for suggestions.
- Schema: Define the structure for extracting information (add properties, set types, and descriptions).
- Preview: See how your schema will be applied.
- Go to the
Historyview from and click on the call you want to analyse. - Click on the
Analysistab.
7. Preview and Share
Before deploying your agent to real users, you can preview how it will perform in different scenarios. Oration AI provides several ways to test your agent.
1. Web Call
- Click the Preview button at the top of the Agent Details page.
- Select Web Call from the dropdown.
- A web-based call interface will open, allowing you to interact with your agent with dynamic variables as if you were a customer calling in.
- Speak and observe how the agent responds in real time.
2. Test Agent via Chat
- In the Preview menu, choose Test Agent.
- This opens a chat window where you can type messages to your agent.
- Use this mode to quickly test conversation flows, responses, and logic without making a real call.
3. Make a Phone Call
- This allows you to experience the full voice interaction over phone, including any telephony features like voicemail detection or call recording.
- Make sure your agent is published and assigned to a phone number before testing this option.
Share your Agent
Once you’re satisfied with your agent’s performance in the preview, you’re ready to share by clicking onSharing button

Tip: Use the preview options to test different scenarios, verify your agent’s responses, and fine-tune its configuration before going live.
Need more help? Reach out to our team at support@oration.ai